This is an old revision of the document!
Zero prerequisites demo tutorial: Simple fetch and place
This tutorial is from the “Demo Tutorials” category, which assumes no prior knowledge of Linux, ROS, Emacs, Lisp or robotics.
Setting Up

You will need a virtual machine to run this tutorial. We use VirtualBox as a software to run virtual machines. This tutorial comes with a virtual machine (VM) image, which contains all the prerequisites required to run the system already preinstalled and set up. You just need to install VirtualBox, download the VM image and start it, and everything else has already been taken care of in the VM.
Technical Requirements
The VM image with VirtualBox has been successfully tested under Windows, MacOS and Ubuntu Linux.
The machine on which you will be running the system needs a graphics card, it can be a built in laptop GPU as well.
We recommend to run the VM on a machine with 8 GB of RAM or more. (The VM itself needs 4 GB of RAM, so the host machine should have at least 5 GB but 8 GB or more would be optimal.)
Install
First, download and install VirtualBox on your computer. Here are some hints on how to do that on Ubuntu, Arch, Windows and MacOS
Ubuntu Linux
You can install VirtualBox via the Ubuntu Software Center or through command line like so:
sudo apt update
sudo apt install virtualbox
Arch-Linux
Follow this tutorial for the install via pacman.
Windows
Download version 5.2.32 for Windows Systems, execute the .exe file and follow the installation instructions.
The CPU needs to support virtualization to run a VM on Windows. The virtualization can be enabled in the BIOS. To get into the BIOS settings restart your machine, hit the settings button while booting (try F2, F8 and F10) and go into the CPU settings. There is something like 'Intel Virtual Technology' or 'CPU Virtualization' which needs to be enabled.
MacOS
Download the .dmg installer for OS X systems, execute the file and follow the instructions. Hint: If the VirtualBox installer fails with The installation failed where it encountered an error that caused the installation to fail. Go to System Preferences > Security & Privacy. Click the ‘Allow’ button at the bottom and re-run the installer.
VirtualBox Setup
First of all, download the Virtual Disk Image cram_vm.vdi here. It contains an Ubuntu 16.04 with ROS kinetic and CRAM v7.0 pre-installed.
Then, launch VirtualBox, which you installed in the previous step.
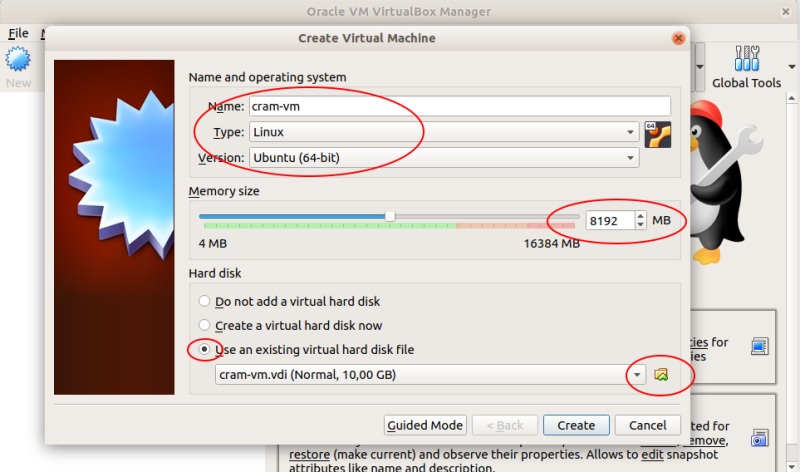
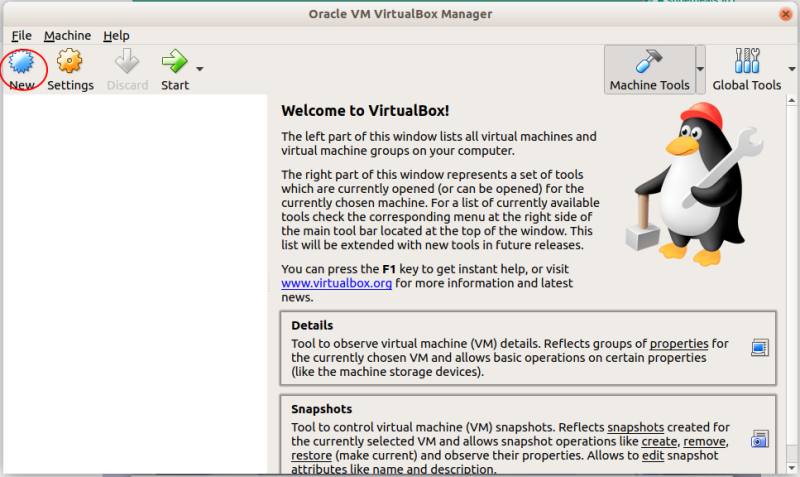
Inside VirtualBox, you first want to create a new virtual machine. Click on the 'New' button:
Usually the simplified menu will open. Change to expert mode, it won't get too complicated.
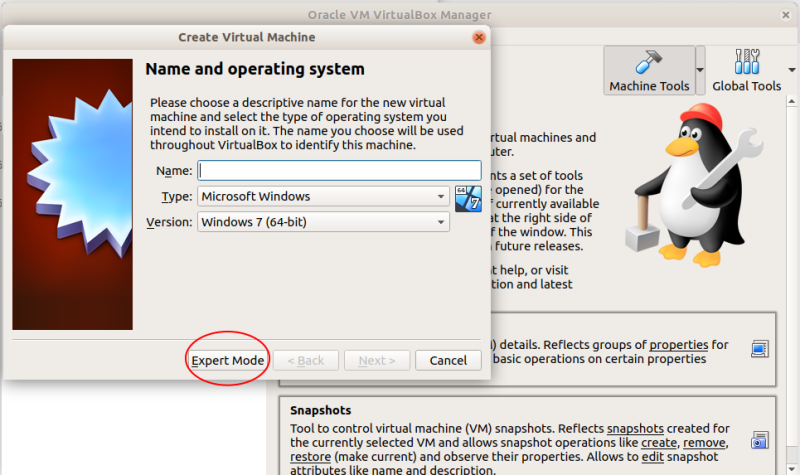
In this view the VM gets
- the name 'cram-vm'
- the OS as 'Linux'
- the version as 'Ubuntu (64-bit)'
Choose the VM's memory size (RAM), depending on your machine's capacity, but less than 4GB could cause performance issues. We suggest 4096 MB (or you can also give it 8192 MB as shown in the screenshot):
The Virtual Disc Image downloaded before can now be used. Instead of creating a new one, the VM is set to 'Use an existing virtual hard disk file'. Over the button at the right the program opens a file explorer, where the cram-vm.vdi needs to be found (usually in Downloads) and selected. Finally 'Create' the VM.
Settings (optional)
For better performance the VM could use some of the CPU's power. Choose the newly created VM and hit 'Settings'. Go to 'System' and 'Processor' and choose how many processor cores you want to give the VM.
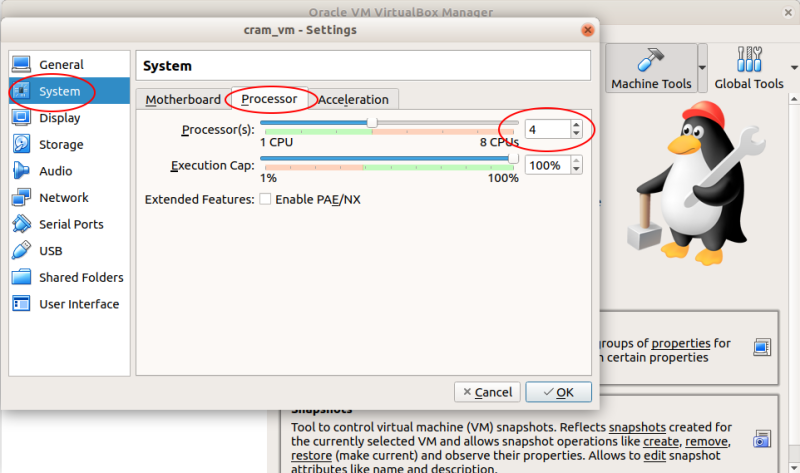
Everything is set up. The VM can now be started. The Ubuntu 16.04 system should start and automatically log into the only account, with the username and password 'cram'.

Understanding the Basics
Ubuntu Linux
The operating system installed in our virtual machine is an Ubuntu Linux, which is perhaps the most mainstream Linux version.
Launching a terminal
A terminal is a command line of the operating system. We will use terminals to start our programs.
To launch a terminal, press the Super Key (the windows key on the keyboard) to open a search bar, type in “terminal” and launch the program.
Alternatively, you can use a keyboard shortcut for starting a terminal: “Ctrl + Alt + T”
Emacs

Emacs is one of the oldest text editors and one of the two most popular text editors in the Linux world.
It is older than the Windows operating system, so its shortcuts are the old Unix shortcuts. For example, instead of “Ctrl-C – Ctrl-V” you have “Ctrl-K – Ctrl-Y”, which stands for “killing” and “yanking”. In a Linux terminal, “Ctrl-C – Ctrl-V” also don't exist, but “Ctrl-K – Ctrl-Y” do.
In addition to being a text editor, Emacs has a powerful plugin engine for running programs inside it. For example, with an email plugin you can read and write emails with Emacs, with a chat plugin you can talk to your friends over any common chat protocol, with a music plugin you can listen to radio through Emacs, with a C++ development plugin you can program in C++ with Emacs, etc.
We are going to use Emacs as an Interactive Development Environment (IDE) for programming our robot, so we will be using the Common Lisp programming plugin of Emacs (it is called Slime).
Launching Emacs
To launch Emacs with the IDE plugin, type into a terminal
$ roslisp_repl &
To see useful key shortcuts for your Emacs IDE, follow this link.
ROS
ROS stands for Robot Operating System. It is software that makes a robot programmer's life easier. For example, it allows programs written in different programming languages to talk to each other.
Lisp
We are going to program our robot in the Lisp programming language.
This language has a convenient command line. If you are curious why Lisp, go here.

Simple Fetch and Place
Robot Environment setup
For this tutorial, we need to set up the robot environment similar to how it is done for the real system, so we will need:
- a so-called occupancy map, which is the floor plan of the room that helps with navigation,
- an Inverse Kinematics solver, which deals with the mathematics related to arm movements,
- a 3D description of the environment with all the furniture,
- as well as a 3D description of the robot itself.
Let's load all these by running a script called the launch file. Open a new terminal and run the following command:
$ roslaunch cram_pick_place_tutorial world.launch
Do not close this terminal instance throughout this tutorial.
Preparing the Lisp Command Line
Open a new terminal window and start Emacs with the Lisp command line, if you don't already have it open. For that type in the terminal:
$ roslisp_repl &
An Emacs window with a Lisp command line will have launched. At this point we can execute some simple Lisp code. In lisp you will always start with an bracket, when you call any function. For variables it will be without a bracket. Try:
CL-USER> (print "Hello World")
Note - “CL-USER>” is a part of your prompt and should not be typed in
Now let's load our pick and place tutorial package. Type in the following two commands into the Lisp command line:
CL-USER> (ros-load:load-system "cram_pick_place_tutorial" :cram-pick-place-tutorial)
CL-USER> (in-package :cram-pick-place-tutorial)
To paste something from, e.g., a browser, into Emacs, press “Ctrl - Y”. Alternatively, in Linux you can select any piece of text in any application and paste it by pressing the middle click.
Your prompt will now change to PP-TUT> which indicates that you have loaded and are now working inside the package called “cram-pick-place-tutorial”.
Launching the simulator
Now to launch a simulation with a kitchen environment and our robot, type the following command into your Lisp command line:
PP-TUT> (roslisp-utilities:startup-ros)
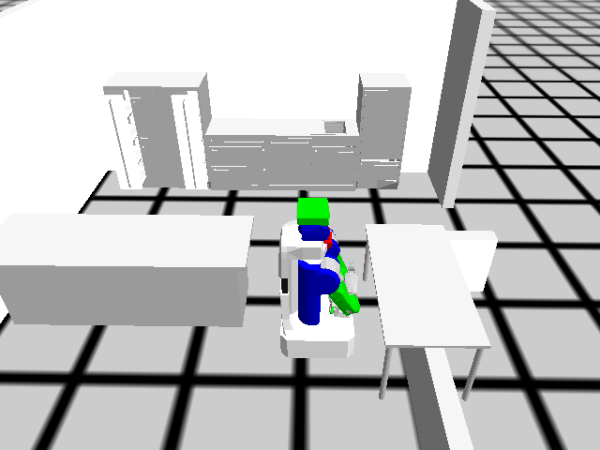
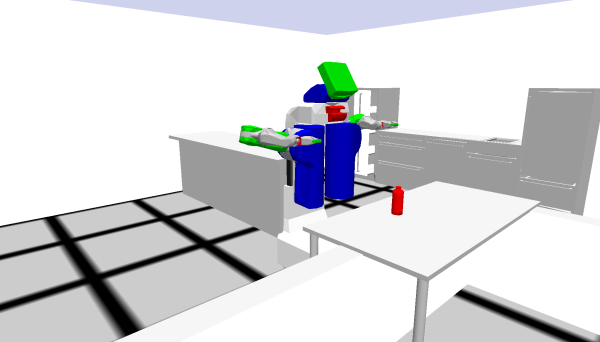
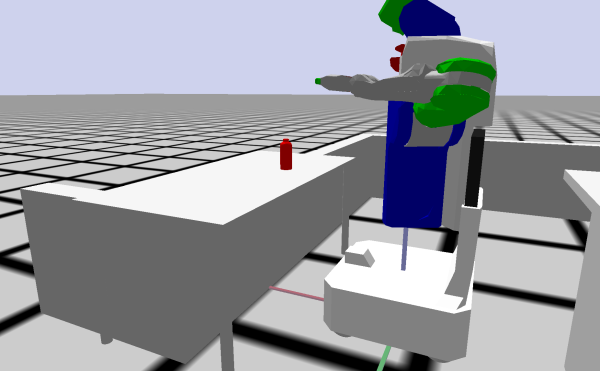
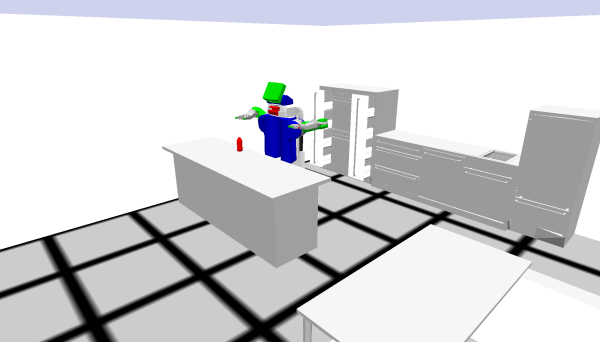
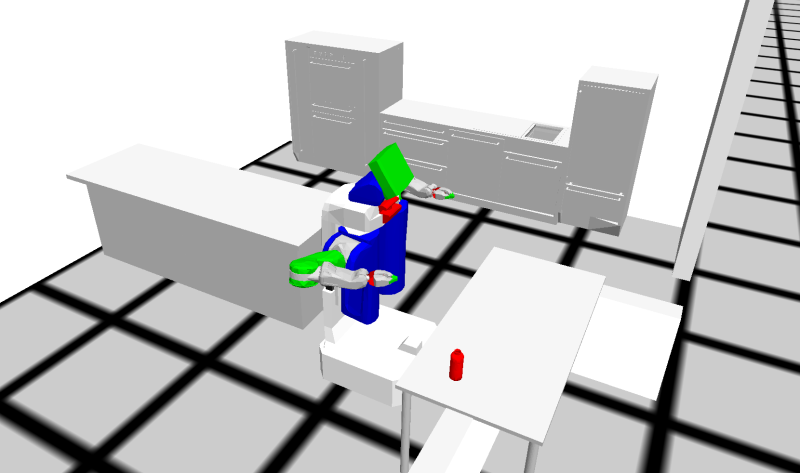
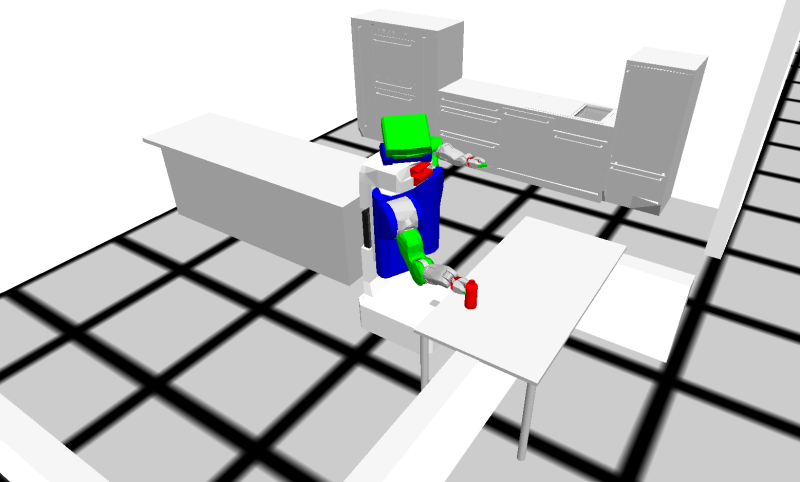
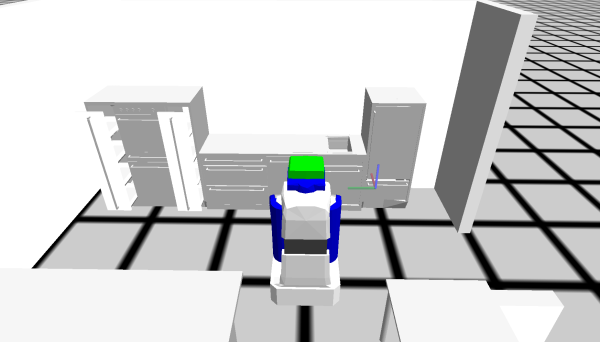
This step could take some time, depending on your system. If it does take longer than 10 minutes you may need to restart. You will get a pop-up window with the environment and the robot inside. We call this environment the Bullet World. The robot we have there is a simulation of the real-life PR2 robot, and we're going to use it to perform various tasks inside the Bullet World.
Note:Please be patient as the startup may take as long as 3 minutes.
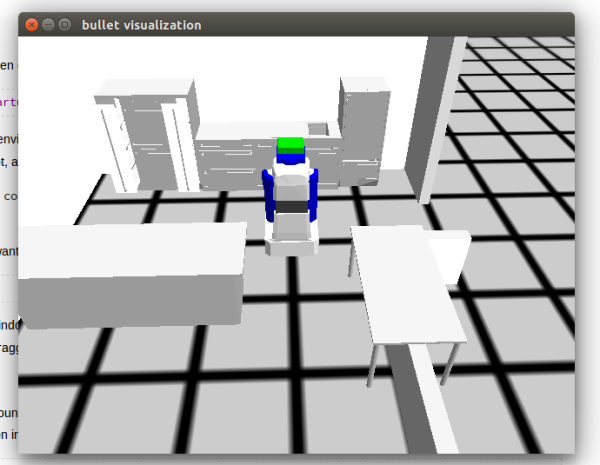
If you get an error saying “Could not contact master at …”, it's because you forgot to start the launch file.
Once you've done that, press “q” to exit the debugger and try again.
At any point during the tutorial, if you want to clean/reset the Bullet World, enter the following command into the Lisp command line:
PP-TUT> (init-projection)
You can change the viewpoint in the window by pressing and dragging the left mouse button. Pressing and dragging the right mouse button translates the camera. Pressing and dragging the middle click doesn't do anything, but you can zoom in and zoom out by scrolling.
Moving Around
First, let's try moving our PR2 robot around the kitchen. Before that let's try to create a pose, which can be given as the target destination for the robot. Execute the following function in the Lisp command line:
PP-TUT> (make-pose "map" '((0 1 0) (0 0 0 1)))
The make-pose function creates the pose and returns it. The “map” is the coordinate frame in which the pose is considered. The argument is a list of two sublists - the first one is the x y z position and the second one is the quaternion of the orientation [( (x y z) (x y z w) )].
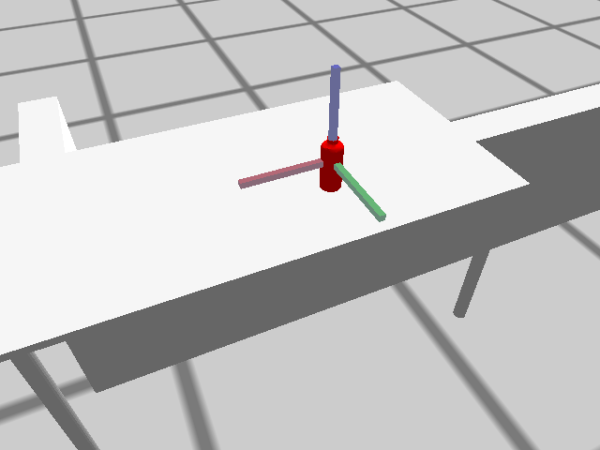
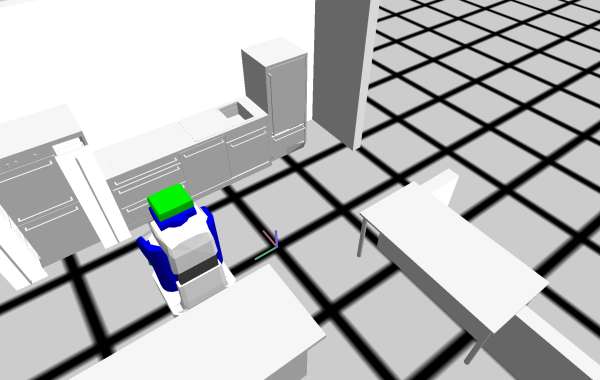
The screenshot below shows axes where the “map” coordinate frame is located. Red is the +ve x-axis, Green is the +ve y-axis and Blue is the +ve z-axis. This is the pose that is referred by '( (0 0 0) (0 0 0 1) ) in “map”. We also call this pose the origin of “map”. All the poses that are in reference to the “map” are relative to this pose. Our robot is, per default, always spawned at the origin of “map”.
Please note that in our Emacs IDE the result of executing something is colored as red. It is not an error but simply a resulting object. You can always inspect the result object by right-clicking on it and saying “Inspect”. That shows the guts of the object. Press “q” to exist the inspector tab.
Let's use this to move around our robot:
PP-TUT>
(with-simulated-robot
  (let ((?navigation-goal (make-pose "map" '((0 1 0) (0 0 0 1)))))
    (perform (an action
                 (type going)
                 (target (a location
                            (pose ?navigation-goal)))))))
To go onto a new line without executing, press “Ctrl-J”.
You can see that the robot has moved to a new location which is 1 meter from the origin along the y-axis in the “map” reference frame. Try to move around different locations on the map by changing the poses. You'll notice that you will get an error of type
CRAM-COMMON-FAILURES:NAVIGATION-POSE-UNREACHABLE if you try to move the robot to positions, which are not valid (due to collisions).
Note:- Notice how we're using with-simulated-robot to enclose the code to perform actions on the robot. This method tells CRAM that our code needs to be run on the simulation and not on the actual PR2 itself.
Note:- The let keyword in Lisp is a handy way to define local variables within its scope. Eg:
PP-TUT> (let ((a 1)
               (b 2))
          (print a)
          b)
1
2
PP-TUT> (print b)
The variable B is unbound.
To exit the debugger, press “q”.
The variables a and b have been declared with values under the scope of let and as soon as the body of let was over, the scope of these variables ended as well.
Now let's move the robot next to the table on the right-hand side of the kitchen. Since we are going to use this pose a lot, we'll save this in a global variable. In Lisp, a parameter is a kind of a global variable.
PP-TUT>
(defparameter *base-pose-near-table*
  (make-pose "map" '((-1.447d0 -0.150d0 0.0d0) (0.0d0 0.0d0 -0.7071067811865475d0 0.7071067811865476d0))))

(with-simulated-robot
  (let ((?navigation-goal *base-pose-near-table*))
    (perform (an action
                 (type going)
                 (target (a location
                            (pose ?navigation-goal)))))))
Don't be surprised if you occasionally see “d0” at the end of the numbers, e.g., -0.150d0. This simply means that the number has a double precision. you can just as well write -0.15, if you don't require very high precision, which we don't in this tutorial.
To go up in the history of your Lisp command line, press “Ctrl-Up” while your cursor is at the prompt. You can scroll through the history by pressing “Ctrl-Up” repeatedly.
To clean all the input that is currently sitting in the prompt, instead of pressing “Backspace” many many times, try “Alt-Ctrl-Backspace”.
Spawning Objects
Now let's try to spawn a new object into the world:
PP-TUT> (spawn-object '((-1.6 -0.9 0.82) (0 0 0 1)))
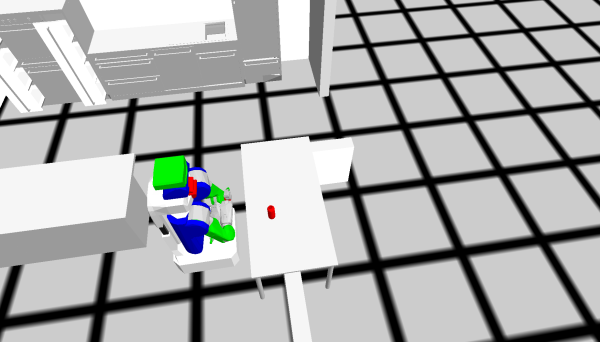
You will see that a red bottle has been created on the table in front of the PR2. By default, this method is written to help you to always create a bottle. But if you want to spawn other objects from our library, like a cube, you can provide it as an argument. Eg:
PP-TUT> (spawn-object '((1.44 1.28 0.85) (0 0 0 1)) :cube 'cube-1)
Here, :cube is the type of the object and 'cube-1 is its name. For the default bottle, type is :bottle and name is 'bottle-1.
To see a list of all available objects, call:
PP-TUT> (list-available-objects)
You can also give a different color to the object in RGB encoding:
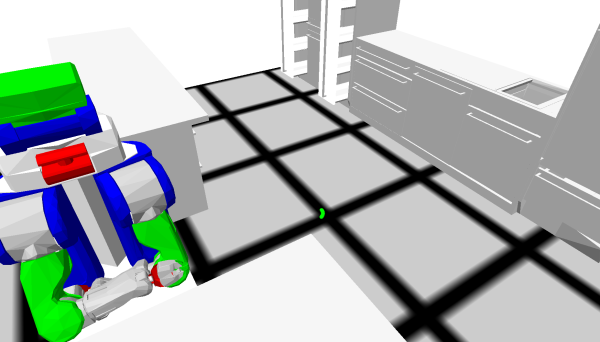
PP-TUT> (spawn-object '((0 0 0.1) (0 0 0 1)) :weisswurst 'wurst-1 '(0 1 0))
This should have spawned a green sausage on the floor near the origin of the “map” coordinate frame.
Perceiving Objects
The objective of this tutorial would be to enable you to write methods to pick an object (for us, the bottle) from one place and transport and place it somewhere else. But before the robot can pick up anything, it has to know where the object is, which is enabled by the cameras placed on the robot. We have to explicitly command the robot to perceive a bottle to find it.
The first step to enable this is to bring the object that has to be detected under the field of view of the robot's cameras. There are some actions that can be done for this
- Position the cameras a bit higher so that the robot can see things easily.
- Move the arms away from the field of view to a standard position - also called parking the arms.
- Move the neck such that the camera is directed towards where you expect the object to be.
Let's do the first two steps in this first. The torso of the robot has a prismatic joint which has limits from 0 to 30cm. So we will set that to the maximum and we'll also call the method to park arms. Since these are two actions that are independent and can be done parallelly, we can bundle them together under a clause called cpl:par. Even navigation can be bundled together with this. So try this:
PP-TUT>
(with-simulated-robot
  (let ((?navigation-goal *base-pose-near-table*))
    (cpl:par
      ;; Moving the robot near the table.
      (perform (an action
                   (type going)
                   (target (a location
                              (pose ?navigation-goal)))))
      ;; Increasing the height of the torso by setting the joint angle to 0.3 meters
      (perform (a motion
                  (type moving-torso)
                  (joint-angle 0.3)))
      ;; Parking the arms
      (park-arms))))
The robot will do all the said actions in parallel.
In Lisp, “;” is the symbol for commentaries. Traditionally, one uses “;” for inline comments, and “;;” for comments that take a full line.
Note how until now we were performing action-s, and moving-torso is a motion.
The distinction is that motions are very low-level, and actions are more high-level.
We will not go into detail here. For now, just remember that moving-torso is a motion, and everything else is an action.
If you get a navigation pose unreachable error, it might be that there are objects on the floor.
To clean up the environment, you can always call (init-projection).
Now, the robot is standing next to the table, the torso is up and the arms are out of the field of view. The next thing to do is to look in the direction where the bottle is expected to be found. We have found the corresponding coordinate for you to direct the robot's gaze, so let's save the pose in a variable and look at it:
PP-TUT>
(defparameter *downward-look-coordinate*
  (make-pose "base_footprint" '((0.65335d0 0.076d0 0.758d0) (0 0 0 1))))
;; This coordinate frame has base_footprint as reference, which is the reference
;; frame of PR2's base.

(with-simulated-robot
  (let ((?looking-direction *downward-look-coordinate*))
    (perform (an action
                 (type looking)
                 (target (a location
                            (pose ?looking-direction)))))))
Notice that the robot now tilts it's head downwards, somewhat in the direction of where the bottle is.
“base_footprint” is a coordinate frame attached to the robot, at the very bottom of its base, on the floor, in the middle of the base square. Whenever the robot moves, the “base_footprint” moves with it.
Here is a visualization of “base_footprint”, the X axis looks to the front of the robot, Y to the left, and Z looks up.
Note, how the coordinate frame is located on the floor.
Now the only thing remaining is to detect, or “perceive” the bottle. We use an action called “detecting” to do this:
PP-TUT>
(with-simulated-robot
  (perform (an action
               (type detecting)
               (object (an object
                           (type bottle))))))
If you get an error that an object could not be perceived, the robot is probably not looking at an object of type bottle.
So press “q” to exit the debugger and tweak the location of the base or the direction of the gaze of the robot and try to perceive again.
After the object has been perceived successfully, our method returns a description of the bottle with its complete information. Let's save this in a variable, as this will be an argument to the methods we will call below.
PP-TUT>
(defparameter *perceived-bottle* nil)
(with-simulated-robot
  (setf *perceived-bottle* (perform (an action
                                        (type detecting)
                                        (object (an object
                                                    (type bottle)))))))
setf is used to assign a value to a variable.
Picking up Objects
Once the object has been found, picking up is very straightforward:
PP-TUT>
(with-simulated-robot
  (let ((?perceived-bottle *perceived-bottle*))
    (perform (an action
                 (type picking-up)
                 (arm right)
                 (grasp left-side)
                 (object ?perceived-bottle))))
   ;; Parking the right arm after grasping, bringing the bottle close to the robot
   ;; and freeing up the field of view.
   (park-arm :right))
You will notice that we have provided in our action description information like which arm to pick up with (right), which side the robot should be grasping from (left-side) and which object to pick up (?perceived-bottle).
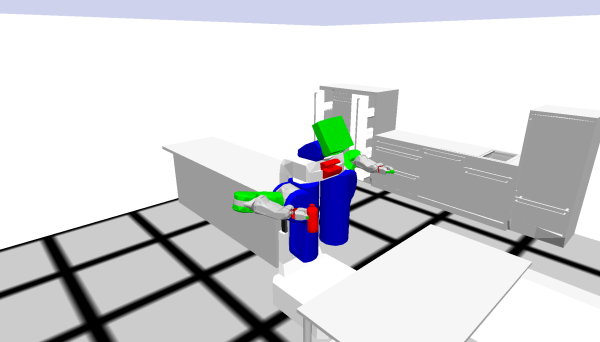
By now, the robot should have successfully picked up the bottle with its right arm.
Placing the object
Now that the robot has the object in its gripper, the next task is to place the object in the destination. Let us use the dining area counter on the left side as our destination. So, to place the bottle the robot has to do two things - drive with the base to a location from where it can place the bottle on the dining table, and move the arm to place the object down.
So before this, let's define two more locations, which are the destination of the bottle and the position of the robot to be able to reach it respectively:
PP-TUT>
(defparameter *final-object-destination*
  (make-pose "map" '((-0.8 2 0.9) (0 0 0 1))))

(defparameter *base-pose-near-counter*
  (make-pose "base_footprint" '((-0.150d0 2.0d0 0.0d0) (0.0d0 0.0d0 -1.0d0 0.0d0))))
Now, finally, we are going to drive with the base, and the placing action is very similar to the picking-up action, but here we provide the target destination instead:
PP-TUT>
(with-simulated-robot
  ;; Moving the robot near the counter.
  (let ((?nav-goal *base-pose-near-counter*))
    (perform (an action
                 (type going)
                 (target (a location
                            (pose ?nav-goal))))))
  ;; Setting the bottle down on the counter
  (let ((?drop-pose *final-object-destination*)
        (?perceived-bottle *perceived-bottle*))
    (perform (an action
                 (type placing)
                 (arm right)
                 (object ?perceived-bottle)
                 (target (a location
                            (pose ?drop-pose))))))
  (park-arm :right))
Simple Plan
Even though we have achieved the goal we had set, the entire process would have felt a little tedious, especially if you want to perform it multiple times, when you have made a mistake, etc. So let's bundle what we have done so far into a single method called, move-bottle which can easily be reused. To save your work so that the changes you make are still available even if you exit Emacs, we will save the code for it in a file.
First let's open the file which we will write into. Press Ctrl-x Ctrl-f to open the “Find file” dialog on the bottom of Emacs. The folder will be set to “~/<workspace>/src/cram/cram_tutorials/cram_pick_place_tutorial/” by default (This is because it is the path of the project we loaded). We have already saved a file called “pick-and-place.lisp” under the src folder of this project as a workspace for you. So open the file by completing the folder name as below and pressing Enter.
Find File: ~/<workspace>/src/cram/cram_tutorials/cram_pick_place_tutorial/src/pick-and-place.lisp
;; Notice that <workspace> has to be replaced by the corresponding folder name and depends
;; on the machine
The file will open up and you'll see that it has only one line as of now:
(in-package :pp-tut)
This line just selects the namespace that we're going to work with and you'll notice that it's the name of the package of this demo. Do not remove this line throughout the demo.
After that you can copy paste the following code into the file:
(defparameter *base-pose-near-table*
  (make-pose "map" '((-1.447 -0.15 0.0) (0.0 0.0 -0.7071 0.7071))))

(defparameter *downward-look-coordinate*
  (make-pose "base_footprint" '((0.65335 0.076 0.758) (0 0 0 1))))

(defparameter *base-pose-near-counter*
  (make-pose "base_footprint" '((-0.15 2 0) (0 0 -1 0))))

(defparameter *final-object-destination*
  (make-pose "map" '((-0.8 2 0.9) (0 0 0 1))))

(defun move-bottle (bottle-spawn-pose)
  (spawn-object bottle-spawn-pose)
  (with-simulated-robot
    (let ((?navigation-goal *base-pose-near-table*))
      (cpl:par
        ;; Moving the robot near the table.
        (perform (an action
                     (type going)
                     (target (a location
                                (pose ?navigation-goal)))))
        (perform (a motion
                    (type moving-torso)
                    (joint-angle 0.3)))
        (park-arms)))
    ;; Looking towards the bottle before perceiving.
    (let ((?looking-direction *downward-look-coordinate*))
      (perform (an action
                   (type looking)
                   (target (a location
                              (pose ?looking-direction))))))
    ;; Detect the bottle on the table.
    (let ((?grasping-arm :right)
          (?perceived-bottle (perform (an action
                                          (type detecting)
                                          (object (an object
                                                      (type bottle)))))))
      ;; Pick up the bottle
      (perform (an action
                   (type picking-up)
                   (arm ?grasping-arm)
                   (grasp left-side)
                   (object ?perceived-bottle)))
      (park-arm ?grasping-arm)
      ;; Moving the robot near the counter.
      (let ((?nav-goal *base-pose-near-counter*))
        (perform (an action
                     (type going)
                     (target (a location
                                (pose ?nav-goal))))))
      ;; Setting the bottle down on the counter
      (let ((?drop-pose *final-object-destination*))
        (perform (an action
                     (type placing)
                     (arm ?grasping-arm)
                     (object ?perceived-bottle)
                     (target (a location
                                (pose ?drop-pose))))))
      (park-arm ?grasping-arm))))
This defines a function called move-bottle with the Lisp command defun.
This function accepts one argument, bottle-spawn-pose, which is the position the bottle will be spawned in.
After spawning the object, move-bottle commands the robot to pick the bottle and place it at its final destination, which is the counter.
First, save the file using the shortcut Ctrl-x Ctrl-s. To use these methods, we need to compile these functions and to do that press Ctrl-c Ctrk-k. You should compile the file any time changes have been made to it. Alternatively, if you only edited one method and want to compile just that, place the cursor on that particular function and press Ctrl-c Ctrl-c.
Now to go back to the REPL to run the code, press Ctrl-x b, type “repl” press Tab and then Enter. This will switch you back to the REPL. Any time you want to switch back to the file, you can type the name of the file instead of repl after Ctrl-x b .
Now, run move-bottle with the coordinates we initially used to spawn the bottle:
PP-TUT> (move-bottle '((-1.6 -0.9 0.82) (0 0 0 1)))
You will see that the robot successfully picks the bottle and places it on the counter.
[If you're stuck, remember that you can always clean up the world using (init-projection).]
Congratulations! You have just written your first rudimentary plan to pick and place a bottle.
Recovering from Failures
The previous example worked perfectly because we knew and provided the exact coordinates to look for the bottle. This is hardly true for the real-life scenario, especially since we are dealing with a kitchen environment, which is far from being precise compared to a factory floor. What would happen if the bottle was moved a little bit to the right of its previous spawn position? For this, let's change the arguments to reflect this on our method, and let's see what happens.
PP-TUT> (move-bottle '((-2 -0.9 0.860) (0 0 0 1)))
Now, the output will look like this.
PP-TUT>
[(PICK-AND-PLACE PERCEIVE) WARN] 1292688669.674: Could not find object #<A OBJECT (TYPE BOTTLE)>.
[(PICK-AND-PLACE PERCEIVE) WARN] 1292688669.674: Could not find object #<A OBJECT (TYPE BOTTLE)>.
[(PICK-AND-PLACE PERCEIVE) WARN] 1292688669.674: Could not find object #<A OBJECT (TYPE BOTTLE)>.
[(PICK-AND-PLACE PERCEIVE) WARN] 1292688669.674: Could not find object #<A OBJECT (TYPE BOTTLE)>.
; Evaluation aborted on #<CRAM-COMMON-FAILURES:PERCEPTION-OBJECT-NOT-FOUND {1013AC5B93}>.
Press “q” to exit the debugger. If that doesn't help, make sure you're in the debugger window, for that just click on the debugger tab to select it.
Clearly, the robot cannot find the object anymore because even though the robot is near the bottle, it is out of the field of vision of the robot due to the predefined base and object pose in our code. Let's try fixing this issue.
We're going to add some code into fixing the perception in our case, so that the robot would still be able to find the bottle. Let's list down a plan of action for this.
- Tilt the head of the robot downwards
- Try to detect the bottle
- If,
- successful in finding the bottle - continue with the rest of the code.
- failed to find the bottle - turn the head to a different configuration (e.g., left/right) and try detecting again.
- When all possible directions fail, error out.
Let's define two additional parameters to aid us. Open pick-and-place.lisp again and add the following code into it.
(defparameter *left-downward-look-coordinate*
  (make-pose "base_footprint" '((0.65335 0.76 0.758) (0 0 0 1))))

(defparameter *right-downward-look-coordinate*
  (make-pose "base_footprint" '((0.65335 -0.76 0.758) (0 0 0 1))))
We defined two coordinates, *left-downward-look-coordinate* and *right-downward-look-coordinate*, in the coordinate frame of our robot's base.
These will be alternative directions (left and right respectively) to look at in the case when looking downward fails.
Now we define a method find-object which encapsulates our plan with failure handling:
(defun find-object (?object-type)
  (let* ((possible-look-directions `(,*downward-look-coordinate*
                                     ,*left-downward-look-coordinate*
                                     ,*right-downward-look-coordinate*))
         (?looking-direction (first possible-look-directions)))
    (setf possible-look-directions (rest possible-look-directions))
    ;; Look towards the first direction
    (perform (an action
                 (type looking)
                 (target (a location
                            (pose ?looking-direction)))))

    ;; perception-object-not-found is the error that we get when the robot cannot find the object.
    ;; Now we're wrapping it in a failure handling clause to handle it
    (handle-failure perception-object-not-found
        ;; Try the action
        ((perform (an action
                      (type detecting)
                      (object (an object
                                  (type ?object-type))))))

      ;; If the action fails, try the following:
      ;; try different look directions until there is none left.
      (when possible-look-directions
        (print "Perception error happened! Turning head.")
        ;; Resetting the head to look forward before turning again
        (perform (an action
                     (type looking)
                     (direction forward)))
        (setf ?looking-direction (first possible-look-directions))
        (setf possible-look-directions (rest possible-look-directions))
        (perform (an action
                     (type looking)
                     (target (a location
                                (pose ?looking-direction)))))
        ;; This statement retries the action again
        (cpl:retry))
      ;; If everything else fails, error out
      ;; Reset the neck before erroring out
      (perform (an action
                   (type looking)
                   (direction forward)))
      (cpl:fail 'object-nowhere-to-be-found))))
Let's see what this method does. The handle-failure clause here deals with perception-object-not-found, which, if you remember, was the error raised when the robot couldn't find the bottle. So instead of only looking downwards, the code will now iterate between downwards, left and right, and only upon a failure in all these, will an error be bubbled up - thus increasing our effective field of view. You have to note that cpl:retry in the failure handling part will trigger a retry of the main action, so it's advised to put it under some conditionals so that you won't end up in an endless loop.
Let's try to understand the syntax of handle-failure. The first argument is the type of error message you're trying to catch and work around. The second argument is the list of steps you want to protect from the said error message and the last part are the actions that you perform once you encounter the said error - cpl:retry is called within this block. This looks like the following (Elements under the tag <> are to be replaced with real programming elements):
(handle-failure <the error type that needs to be handled>
    (<all the actions to be performed under normal execution>)
  (<actions that need to be performed if there is an error of the declared type. Call retry if necessary>))
We have used the methods first and rest to iterate between our possible looking directions. first always returns the first element in a list. rest returns a list without including the first element.
PP-TUT> (first '(1 2 3 4))
1
PP-TUT> (rest '(1 2 3 4))
(2 3 4)
In our failure handling code, we use (first possible-look-directions) to get the first element in the possible looking directions list and set it as our new direction to look. Then we reduce our possible directions list by setting it to the rest of the list without the first element (setf possible-look-directions (rest possible-look-directions)). This can be applied to failure handling strategies that iterate on elements of a list as possible fixes.
Now we need to redefine our existing move-bottle to use this method, so modify the existing function with the updated one below
(defun move-bottle (bottle-spawn-pose)
  (spawn-object bottle-spawn-pose)
  (with-simulated-robot
    (let ((?navigation-goal *base-pose-near-table*))
      (cpl:par
        ;; Moving the robot near the table.
        (perform (an action
                     (type going)
                     (target (a location
                                (pose ?navigation-goal)))))
        (perform (a motion
                    (type moving-torso)
                    (joint-angle 0.3)))
        (park-arms)))
    ;; Find and detect the bottle on the table. We use the new method here
    (let ((?perceived-bottle (find-object :bottle))
          (?grasping-arm :right))
      (perform (an action
                   (type picking-up)
                   (arm ?grasping-arm)
                   (grasp left-side)
                   (object ?perceived-bottle)))
      (park-arm ?grasping-arm)
      ;; Moving the robot near the counter.
      (let ((?nav-goal *base-pose-near-counter*))
        (perform (an action
                     (type going)
                     (target (a location
                                (pose ?nav-goal))))))
      ;; Setting the object down on the counter
      (let ((?drop-pose *final-object-destination*))
        (perform (an action
                     (type placing)
                     (arm ?grasping-arm)
                     (object ?perceived-bottle)
                     (target (a location
                                (pose ?drop-pose))))))
      (park-arm ?grasping-arm))))
Save the changes, compile the file again and switch back to the REPL.
Now run:
PP-TUT> (move-bottle '((-2 -0.9 0.860) (0 0 0 1)))
And once again, you'll find that the robot succeeds in transporting the bottle.
If you get an error that says the manipulation goal is unreachable, that's because the Inverse Kinematics solver is not deterministic and sometimes finds a solution and sometimes does not, so simply press “q” to exit the debugger and try again.
Handling More Failures
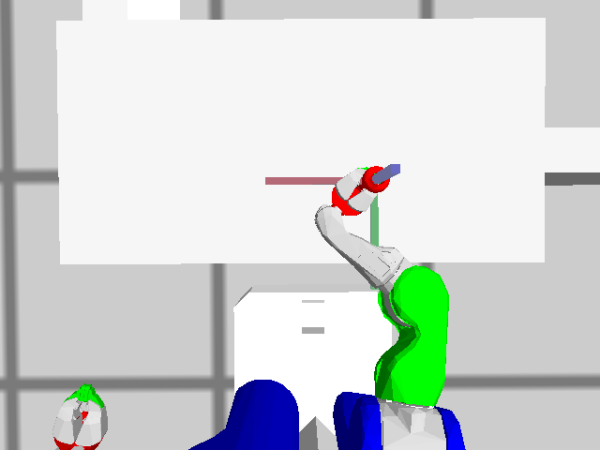
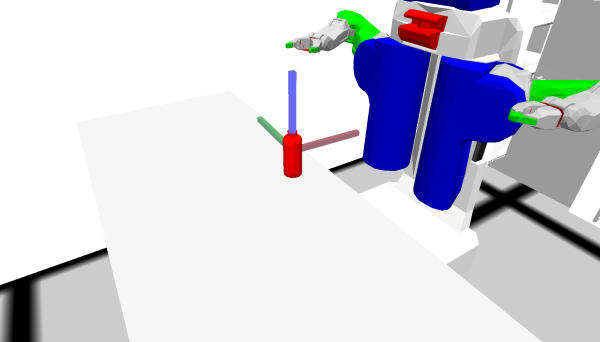
Everything is good so far, even though by design, let's call this a lucky coincidence. For the robot, knowing which arm to use to pick up the bottle is not always enough. There are many positions with which we can grasp objects - from the object's front, back, left, right, etc. So what decides the “side” (left, right, top, bottom) of the object? As you might have guessed, these are defined for objects according to the coordinate reference frame of each object. Every object spawned in the bullet world has its own coordinate axes - even rotationally symmetric objects like the bottle here. (Red:+ve x, Green: +ve y, Blue: +ve z axes)
- +ve x-axis → front, -ve x-axis → back
- +ve y-axis → left, -ve y-axis → right
- +ve z-axis → top, -ve z-axis → bottom
And a grasp means that the gripper of the robot approaches from that side and grasps it. So, a left-side grasp means the robot gripper approaches from the +ve y-axis of the bottle and grasps it.
One might think that since the bottle is a rotationally symmetric object, it doesn't matter which side you approach from. But consider the bottle as a generic object, which does not necessarily have to be symmetric. Each object is represented as a 3D model, which has a specific front, back, and sides according to the coordinate frame that model is defined in. In which case, the side with which the arm approaches the bottle greatly matters, accounting for the configuration of the joints the robot arm will make while trying to grasp - some poses may be unachievable, while others may result in the collision of the arm with the table.
Let's try to create this issue in our scenario, by spawning the bottle in yet another position:
PP-TUT> (spawn-object '((-1.0 -0.75 0.860) (0 0 0 1)))
Now run move-bottle once more, and the output should be something similar to the following:
PP-TUT> (move-bottle '((-1.0 -0.75 0.860) (0 0 0 1)))
[(PICK-PLACE PICK-UP) INFO] 1566442996.350: Opening gripper
[(PICK-PLACE PICK-UP) INFO] 1566442996.350: Reaching
[(PICK-PLACE MOVE-ARMS-IN-SEQUENCE) ERROR] 1566442996.818: #<POSE-STAMPED
   FRAME-ID: "torso_lift_link", STAMP: 0.0
   #<3D-VECTOR (0.4865934453898557d0 0.39450056642817605d0 -0.2601495772666721d0)>
   #<QUATERNION (-0.001459550578147173d0 0.006997527088969946d0 0.11667527258396149d0 0.9931443929672241d0)>> is unreachable for EE.
Failing.
[(PP-PLANS PICK-UP) WARN] 1566442996.818: Manipulation messed up: #<POSE-STAMPED
   FRAME-ID: "torso_lift_link", STAMP: 0.0
   #<3D-VECTOR (0.4865934453898557d0 0.39450056642817605d0 -0.2601495772666721d0)>
   #<QUATERNION (-0.001459550578147173d0 0.006997527088969946d0 0.11667527258396149d0 0.9931443929672241d0)>> is unreachable for EE.
Ignoring.
[(PICK-PLACE PICK-UP) INFO] 1566442996.818: Gripping
[(PICK-AND-PLACE GRIP) WARN] 1566442996.857: There was no object to grip
Retrying
[(PICK-AND-PLACE GRIP) WARN] 1566442996.868: No retries left. Propagating up.
; Evaluation aborted on #<GRIPPER-CLOSED-COMPLETELY {100C2C57A3}>.
The robot has failed to grasp again, even though the bottle is well within perception and grasping range.
Note: You might also encounter an error of a different type called “MANIPULATION-POSE-UNREACHABLE”. This is perfectly fine and is also a possible error.
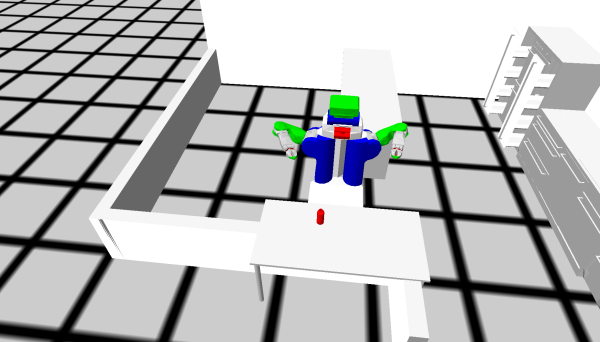
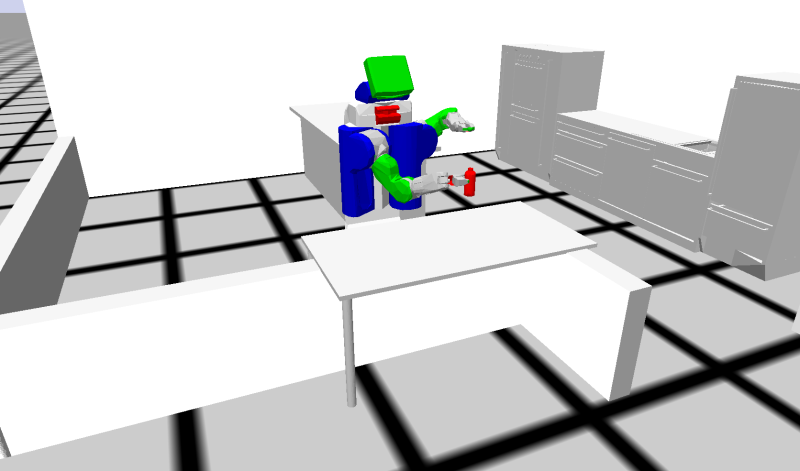
So what went wrong? For this, we have to think back to the definition of our ?grasping-arm. Notice that we always use the right arm to grasp the object, with the hardcoded grasp from the left side of the object. But if you look at the position of the bottle now (refer to the figure below), hardcoding these might not be the best idea at all. After all, we have a perfectly functioning left arm and a bunch of grasp configurations to try.
Not all objects have the same possible grasps. How do we know what grasps are defined in our system for specific objects? Try this function:
PP-TUT> (list-defined-grasps :bottle)
To figure out a good failure handling strategy, let's once again come up with a plan, formulated in natural language:
- Choose the favored arm.
- Get all possible grasp poses for the given type of the object and the arm.
- Choose one grasp from the possible grasp list.
- Try to grasp the object.
- If,
- Grasp succeeds - Continue with the rest of the code
- Grasp Fails - Choose a different grasp pose from the list.
- When no more possible grasp poses, try changing the arm used to grasp Once and try resuming from Step (2)
- When attempted with all arms and grasps, error out.
Let's encapsulate all this in a method called pick-up-object. Open up pick-and-place.lisp once more and add the following code to the file:
(defun pick-up-object (?perceived-object ?grasping-arm)
  (let* ((?possible-grasps '(:left-side :right-side :front :back))
         (?grasp (first ?possible-grasps)))
    (setf ?possible-grasps (rest ?possible-grasps))

    (cpl:with-retry-counters ((arm-change-retry 1))
      ;; Outer handle failure handling arm change
      (handle-failure object-unreachable
          ;; Iner handle-failure handling grasp change
          ((handle-failure (or manipulation-pose-unreachable gripper-closed-completely)
               ;; Try to perform the pick up
               ((perform (an action
                             (type picking-up)
                             (arm ?grasping-arm)
                             (grasp ?grasp)
                             (object ?perceived-object))))
             ;; When pick-up fails this block gets executed
             (format t "Grasp failed! Error: ~a~%Grasp: ~a~%Arm: ~a~%"
                     e ?grasp ?grasping-arm)
             ;; Checks if we have any possible grasps left.
             ;; If yes, then the block nested to it gets executed, which will
             ;; set the grasp that is used to the new value and trigger retry
             (when (first ?possible-grasps)
               (format t "Retyring! Trying to grasp from ~a using ~a arm"
                       ?grasp ?grasping-arm)
               (setf ?grasp (first ?possible-grasps))
               (setf ?possible-grasps (rest ?possible-grasps))
               (park-arms)
               (cpl:retry))
             ;; This will get executed when there are no more elements in the
             ;; ?possible-grasps list. We print the error message and throw a new error
             ;; which will be caught by the outer handle-failure
             (print  "No more grasp retries left :(")
             (cpl:fail 'object-unreachable)))

        ;; This is the failure management of the outer handle-failure call
        ;; It changes the arm that is used to grasp
        (print "Manipulation failed!!")
        (print e)

        ;; Here we use the retry counter we defined. The value is decremented automatically
        (cpl:do-retry arm-change-retry
          ;; if the current grasping arm is right set left, else set right
          (setf ?grasping-arm (if (eq ?grasping-arm :right)
                                  :left
                                  :right))
          (cpl:retry))
        ;; When all retries are exhausted print the error message.
        (print "No more arm change retries left :("))))
  ?grasping-arm)
With this, the pick-up-object can now iterate through all possible grasp configurations stored in ?possible-grasps.
Even though this code block looks big, we're mostly doing things that we learned in the previous failure handling scenario. But there are two new things that we do here: First, we have used two handle-failure nested, meaning one handle-failure is called within the other, with the main action nested inside the innermost handle-failure, allowing us to layer our issues. When the program is executed, whenever a failure is encountered, it checks within the inner failure handling clause and retries according to it's conditions, and only upon failure of all its scenarios will it bubble up the error to the outer failure handling clause.
Next is the cpl:with-retry-counters. We discussed earlier that we need to have some conditions to not let the retry be called an infinite number of times and get stuck in a loop. cpl:with-retry-counters is one method of doing this, by allowing the user to specify a number to limit the retries, by allowing the user to initialize a counter with a specified number of retries. This counter is used track of how many times the retry is being called. And whenever you see call to cpl:do-retry with the name of the counter, this means that the retry is done only when the counter has a non-zero value and after a retry is done the counter values is decremented. You have to note that the initial try is not counted towards a retry.
So let's see how both of these help with our situation. The inner failure-handling part will take care of manipulation-pose-unreachable or gripper-closed-completely - both of which are errors which can occur during a failed grasp. The recovery method will iterate through all possible grasp configurations for a given arm. Upon failure of this, the outer failure handling clause will take care of the object-unreachable error thrown by the inner part and it'll change the arm it's trying to grasp the object with and then retry the entire procedure again. The arm change is only required once and thus we use a retry counter called arm-change-retry to do it.
And only upon the failure of all these will the error be bubbled up. The method also returns the grasping arm which it used to pick the object up so that the rest of the code is aware of the arm in which the bottle rests. We have also written appropriate warning statements to be informed about the actions the robot is taking.
Also let's redefine move-bottle again to include these changes, so replace the existing method with the code as shown below:
(defun move-bottle (bottle-spawn-pose)
  (spawn-object bottle-spawn-pose)
  (with-simulated-robot
    (let ((?navigation-goal *base-pose-near-table*))
      (cpl:par
        ;; Moving the robot near the table.
        (perform (an action
                     (type going)
                     (target (a location
                                (pose ?navigation-goal)))))
        (perform (a motion
                    (type moving-torso)
                    (joint-angle 0.3)))
        (park-arms)))

    (let ((?perceived-bottle (find-object :bottle))
          (?grasping-arm :right))
      ;; We update the value of ?grasping-arm according to what the method used
      (setf ?grasping-arm (pick-up-object ?perceived-bottle ?grasping-arm))
      (park-arm ?grasping-arm)
      ;; Moving the robot near the counter.
      (let ((?nav-goal *base-pose-near-counter*))
        (perform (an action
                     (type going)
                     (target (a location
                                (pose ?nav-goal))))))
       ;; Setting the object down on the counter
      (let ((?drop-pose *final-object-destination*))
        (perform (an action
                     (type placing)
                     (arm ?grasping-arm)
                     (object ?perceived-bottle)
                     (target (a location
                                (pose ?drop-pose))))))
      (park-arm ?grasping-arm))))
Save the file, compile and switch back to the REPL.
You should see a result that looks like the one below. [Some messages that would come up are suppressed here for readability.]
PP-TUT> (move-bottle '((-1.0 -0.75 0.860) (0 0 0 1)))
[(PICK-PLACE PICK-UP) INFO] 1550504321.279: Opening gripper
[(PICK-PLACE PICK-UP) INFO] 1550504321.279: Reaching
[(GRASP-FAILURE) WARN] Failed to grasp from LEFT-SIDE using RIGHT arm
[(TRYING-NEW-GRASP) INFO] 1550504800.749: Trying to grasp from RIGHT-SIDE using RIGHT arm
[(PICK-PLACE PICK-UP) INFO] 1550504800.789: Opening gripper
[(PICK-PLACE PICK-UP) INFO] 1550504800.789: Reaching
[(GRASP-FAILURE) WARN] Failed to grasp from RIGHT-SIDE using RIGHT arm
[(TRYING-NEW-GRASP) INFO] 1550504801.577: Trying to grasp from BACK using RIGHT arm
[(PICK-PLACE PICK-UP) INFO] 1550504801.601: Opening gripper
[(PICK-PLACE PICK-UP) INFO] 1550504801.602: Reaching
[(PICK-PLACE PICK-UP) INFO] 1550504801.939: Gripping
[(PICK-PLACE PICK-UP) INFO] 1550504801.973: Assert grasp into knowledge base
[(PICK-PLACE PICK-UP) INFO] 1550504801.974: Lifting
[(PICK-PLACE PLACE) INFO] 1550504802.356: Reaching
[(PICK-PLACE PLACE) INFO] 1550504802.508: Putting
[(PICK-PLACE PLACE) INFO] 1550504802.619: Opening gripper
[(PICK-PLACE PLACE) INFO] 1550504802.655: Retract grasp in knowledge base
[(PICK-PLACE PLACE) INFO] 1550504802.660: Retracting
The robot has once again succeeded in grasping the object.
One trend you'll notice in both of the failure handling methods that we wrote is: for one line of execution of robot action, we had to write 10+ lines of code to take care of possible failures. And this is how the programs for robots are written, in which failure handling routines dominate a huge part of it.
Visualizing Coordinates
If you want to know if a coordinate you defined is correct, you can visualize the axis of the coordinate frame in the Bullet World and see for yourself. Try the following:
PP-TUT> (visualize-coordinates :bottle)
This will spawn a coordinate frame on our bottle object.
The argument here is the object type for which we want to visualize the coordinates.
Make sure you use : in front of the bottle because it's an object type.
You can also visualize the coordinates of an object with a specific name:
PP-TUT> (spawn-object '((1.5 1 1) (0 0 0 1)) :weisswurst 'wurst-1 '(0 1 0))
PP-TUT> (visualize-coordinates 'wurst-1)
This will spawn a green sausage on the sink counter and visualize its coordinate frame.
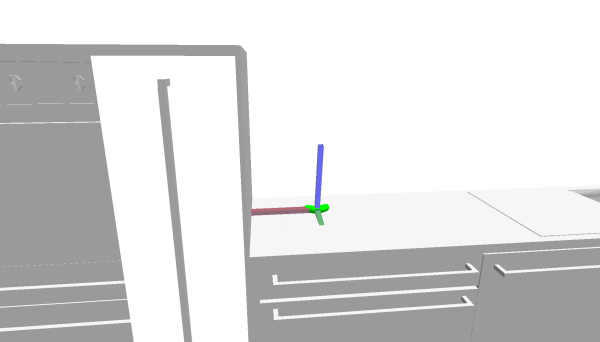
Note how here we used the name of the object, 'wurst-1, instead of its type, :weisswurst. Note:The
weisswurst might have a different coordinate axes than that shown in the picture below for you below because of
its shape and the randomness of the simulation
You can also visualize poses that don't have any objects on them yet, for example:
PP-TUT> (init-projection)
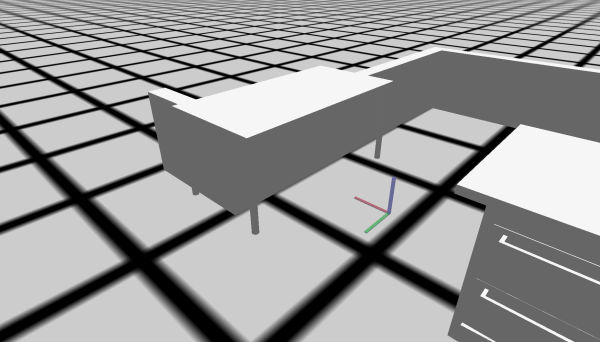
PP-TUT> (visualize-coordinates *base-pose-near-table*)
You will see the coordinate near the table on the right side of the kitchen visualized.
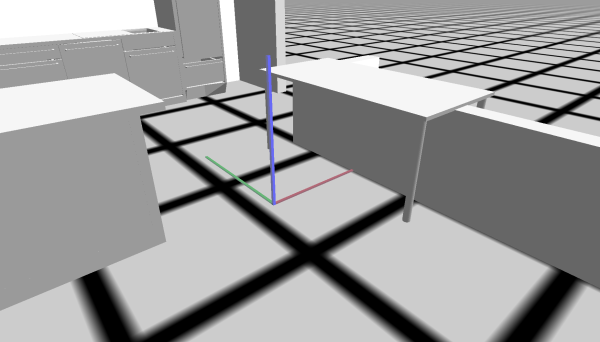
You can also change the scale of the coordinate frame, if you don't quite see it:
PP-TUT> (visualize-coordinates *base-pose-near-table* 1.0)
That will make the axes 1 meter long.
You can also visualize a pose in a coordinate frame different to “map”,
but our visualizer always shows the coordinates with respect to the “map” frame.
So, if you want to visualize a looking location or so, assume that the robot is standing in its initial location,
which is the (0, 0, 0) or the map, and consider the visualization with respect to the robot standing there:
PP-TUT> (visualize-coordinates *right-downward-look-coordinate*)
Exercise 1
Difficulty level: Easy.
Now that we figured out how to do some failure handling, let's do an exercise! Move the bottle completely out of the reach of the robot. For example, place it at the kitchen island, near the narrower edge:
PP-TUT> (spawn-object '((-1.0 0.75 0.860) (0 0 0 1)))
Now, try to write a failure handling strategy to adjust the base pose of the robot so that it can once again grab the bottle. It should be able to grasp the object from both the old locations and the new ones. The easiest is to define a couple more base poses, as global variables/parameters, to try from.
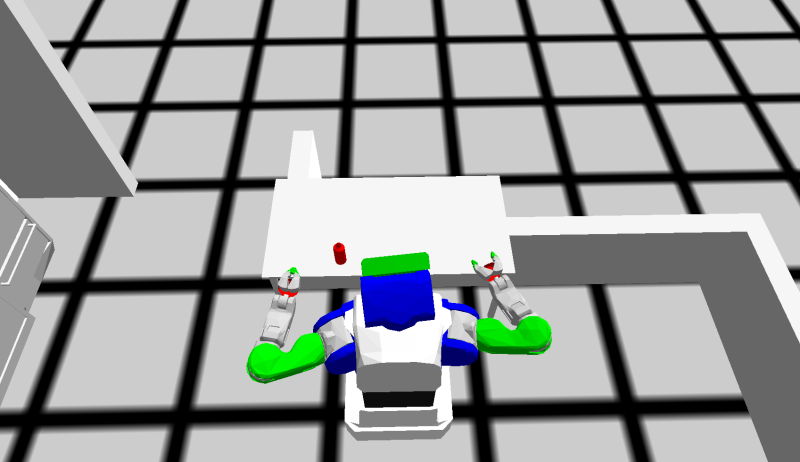
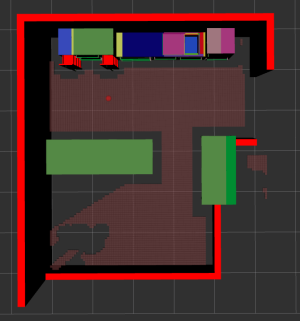
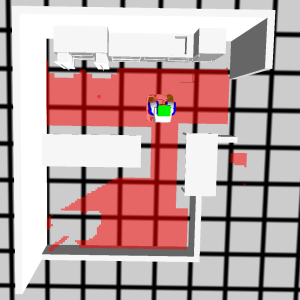
Whenever you command the robot to move somewhere, make sure that you are not asking him to leave the environment, PR2 cannot leave the premises of the room. The screenshot below is the top-view of the bullet world, where the red/brown region indicates the area where the PR2 is allowed to stand.
Here is a simple plan of action for this exercise:
- Using
defparameter, define three-four additional base poses for the robot to stand near different surfaces, where objects can potentially be standing. Make sure that your pose is feasible byperforming thegoingaction with the?goalbeing your defined new pose. - Find the current implementation of
move-objectthat we used last. - Wrap the part of
move-objectwherefind-objecthappens into ahandle-failureclause, which sends the robot to a different location and retries. You can put yourhandle-failureright inside thelet, or you can define an intermediatefind-object-with-base-movement, which does the base retries and callsfind-objectinside.
If you decide to do your handle-failure right inside the let, it can look as following:
(let ((?perceived-bottle

        (let ((my-new-awesome-lists ...)...)
          (handle-failure ...
             ((find-object ...))
            (do-the-handling)))

      (?and-the-other-variables ...))
  (the-insides-of-the-outer-let))
This might look very weird to a person, who's used to traditional imperative programming style, but in functional programming this is totally possible and readable, if you use enough white space ;).
Exercise 1-B (Difficulty level: Advanced): To increase the complexity, try to write a function that can calculate a good base position for any location of the object, such that you are now not hardcoding the base poses but calculating them depending on the object pose. With that the robot should be able to grasp the object from any location on any of the two tables.
Exercise 2
Difficulty level: Easy.
Until now, we did not care about the order of different things that we try out. For example, we always first try to pick up the object with the right arm, and only if that fails, with the left arm. But what if it is more or less obvious, that the object is easier grasped with the left arm, for example, in case the object is on the far left side of the robot.
So, let us suggest the robot a good arm to start with, and if that doesn't work, we can always fall back to the alternative arm.
For that, check the base pose of the robot and the relative pose of the bottle and see if you can write a method which suggests which arm to use to pick up, depending on the relative position of the bottle.
Here are the steps for solving this exercise:
- Define a new function called
get-preferred-arm, which as an argument gets an object description thatfind-objectreturns. - Inside the function, find the object pose in the map frame:
map-P-object. - Also, find the robot transform in map frame:
map-T-robot. - Invert the robot transform to get
robot-T-map. - Multiply inverted robot transform with object transform to get the object pose relative to the robot:
robot-T-map * map-P-object = robot-P-object. - Use the X and Y coordinates of the object pose to decide which arm to use.
You can use the following helper functions to solve this exercise:
;; gets a description of an object from FIND-OBJECT and returns the name, e.g., 'bottle-1
(get-object-name PERCEIVED-OBJECT-DESCRIPTION)

;; returns a pose in the "map" frame of an object, given its name, e.g., 'bottle-1
(get-current-pose-of-object OBJECT-NAME)

;; returns the transformation from robot frame into map frame, i.e., map-T-robot
(get-robot-transformation)

;; inverts a transform, i.e. x-T-y turns into y-T-x
(inverse-transformation TRANSFORM)

;; multiplies given TRANSFORM with POSE, i.e. x-T-y * y-P-z = x-P-z
(apply-transformation transform pose)

;; returns the X component of a pose, e.g., for a '((1 2 3) (0 0 0 1)) that would be 1
(get-x-of-pose POSE)

;; returns the Y component of a pose, e.g., for a '((1 2 3) (0 0 0 1)) that would be 2
(get-y-of-pose POSE)
Exercise 3
Difficulty level: Easy.
When an object cannot be found even though we looked into three different directions, one other thing that can help is to move the torso up and down to increase the field of view even more.
Here's how we should do it:
- Find the previous implementation of FIND-OBJECT that we used.
- Create a list of possible torso positions: we could start with 0, then retry with 0.1, 0.2 and 0.3.
- Wrap the detecting action, which was already wrapped with a failure handling for looking in different directions, into yet another
handle-failureforobject-nowhere-to-be-foundfailure, because this is the failure that we throw if all looking directions fail. - When implementing your failure handling, make sure that you reset the looking directions list and the variable, because otherwise the robot will think that he exhausted all the looking directions and will only look straight after you have moved the torso.
Defining a New Grasp
We discussed predefined possible grasps for a bottle in the previous section, which were 4 in number. Even though there are a lot of different possible grasps in real life, using only 4 limited our possible ways of grasping the bottle. So can we add more? Of course! Let's see that in this section. Let's try to grasp the bottle diagonally between positive x and y axes. We'll call this the front-left-diagonal grasp.
There are two things to be carried out during any grasp pose: First is the translation the gripper will have to make to perform the grasp and the other one is the orientation the gripper will have to make to match the grasp that is to be performed.
You car refer the image below again to see what axes correspond to what face of the object.
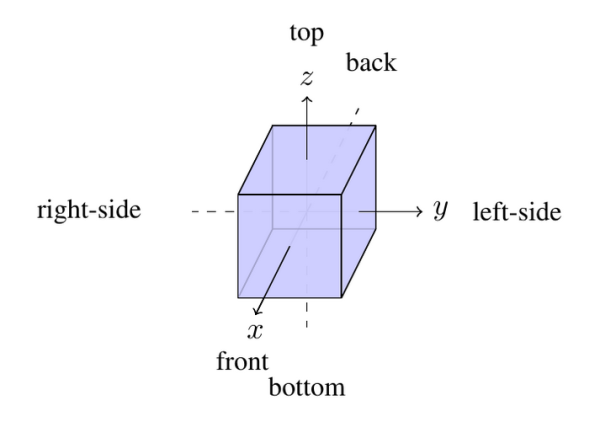
For a front-left-diagonal grasp, the gripper has to come positive x and y-axis side and then close in and finally do a lift to complete the object pick-up. So we'll define some parameters that will help us do the translation part of the grasping. The values are taken from the predefined grasp offset values in <your workspace>/cram/cram_knowrob/cram_knowrob_pick_place/src/grasping.lisp
(defparameter *lift-z-offset* 0.15 "in meters")
(defparameter *lift-offset* `(0.0 0.0 ,*lift-z-offset*))

(defparameter *bottle-pregrasp-xy-offset* 0.15 "in meters")
(defparameter *bottle-grasp-xy-offset* 0.02 "in meters")
(defparameter *bottle-grasp-z-offset* 0.005 "in meters")
As for the orientation, first, we need to know what the axes of the gripper are like to match it with the direction we want to approach it from. For a standard gripper, Z-axis points towards the object, X is along the palm, Y is defined by the right-hand rule. Thus, to make the front-left diagonal grasp, the z-axis of the gripper should point 45 degrees in between the x and y-axes of the object. And since we are grasping across the z-axis of the bottle, since the bottle is standing along the z-axis, we'll keep our palm, which is our x-axis, perpendicular to the z-axis of the bottle.
To visualize this easily, open your left palm with the thumb perpendicular to the other 4 fingers, now imagine the y-axis going along your thumb, the x-axis along your other 4 fingers and the z-axis coming from inside your palm perpendicular to the surface. Now to grasp a bottle, you'll face the palm to the bottle which is the z-axis and your 4 fingers will be horizontally perpendicular to the height (z-axis) of the bottle.
(defparameter *sin-pi/4* (sin (/ pi 4)))
(defparameter *-sin-pi/4* (- (sin (/ pi 4))))

(defparameter *diagonal-rotation*
        `((,*sin-pi/4* 0 ,*-sin-pi/4*)
          (,*-sin-pi/4* 0 ,*-sin-pi/4*)
          (0 1 0)))
The rotation matrix given above is the rotation matrix required to bring the gripper from the identity pose to the pose that we need to make a left-diagonal grasp. This is achieved by rotating the identity pose along the x-axis by +90 degrees first, and then rotating the new pose-along the y-axis by -45 degrees. Try to visualize these rotations mentally. Note:-Since sin(pi/4) = cos(pi/4), we have only defined one variable and used it interchangeably in the defined rotation matrix
Now let's define the method that tie up all this and let ROS know that a new grasp is available
(cram-object-interfaces:def-object-type-to-gripper-transforms '(:drink :bottle) '(:left :right) :fl-diagonal
  :grasp-translation `(,(- *bottle-grasp-xy-offset*) ,(- *bottle-grasp-xy-offset*) ,*bottle-grasp-z-offset*)
  :grasp-rot-matrix *diagonal-rotation*
  :pregrasp-offsets `(,*bottle-grasp-xy-offset* ,*bottle-pregrasp-xy-offset* ,*lift-z-offset*)
  :lift-offsets *lift-offset*)
The summary of this code is pretty simple, we have defined a grasp called fl-diagonal for objects drink and bottle, which can be accessed with the left or right arm of the robot. The pre-grasp offset gives you the distance the gripper will be positioned before the grasp. The grasp-traslation gives the translation that the gripper will perform during the grasping. You can see that they're coming from the positive x and y axis and closing that distance during translation. The grasp-rot-matrix gives the orientation required for gripping.
Now that we have defined our new grasp let's see it in action. First, spawn the bottle again and position the robot ready to pick up.
(spawn-object '((-1.6 -0.9 0.82) (0 0 0 1)))
  (pr2-proj:with-simulated-robot
    (let ((?navigation-goal *base-pose-near-table*))
      (cpl:par
        (exe:perform (desig:a motion
                              (type moving-torso)
                              (joint-angle 0.3)))
        (park-arms)
        ;; Moving the robot near the table.
        (exe:perform (desig:a motion
                              (type going)
                              (target (desig:a location
                                               (pose ?navigation-goal)))))))
    ;; Looking towards the bottle before perceiving.
    (let ((?looking-direction *downward-look-coordinate*))
      (exe:perform (desig:a motion
                            (type looking)
                            (target (desig:a location
                                             (pose ?looking-direction))))))
    ;; Detect the bottle on the table.
    (setf *perceived-bottle* (exe:perform (desig:a motion
                                                   (type detecting)
                                                   (object (desig:an object
                                                                     (type :bottle)))))))
Now let's call the pick-up action with the grasp fl-diagonal as we have defined.
(pr2-proj:with-simulated-robot
  (let ((?perceived-bottle *perceived-bottle*))
    (exe:perform (desig:an action
                           (type picking-up)
                           (arm right)
                           (grasp fl-diagonal)
                           (object ?perceived-bottle)))))
You will see that PR2 will successfully grasp the bottle from the grasp pose that we defined.
Exercise 4
Difficulty level: Medium.
Now that we learned how to define new grasps, try to define your own! A top grasp should be a simple one: you need to align the direction of the gripper with the negative Z axis of the object. The Z axis of the object is the one that looks from bottom to top and you want the gripper to look from top to bottom.
Exercise 5
Difficulty level: Advanced.
Even though we already covered a lot of scenarios here, there are many more things that can be added and handled. One of the advanced things that you could do is: if an object placement location is unreachable with the current grasp, try to place it down somewhere intermediately and regrasp it in a different way.
Credits
This tutorial was created with the combined efforts of Amar Fayaz, Arthur Niedzwiecki and Gayane Kazhoyan.

